Tag: DIY

DIY 346: Spa Party~personalized lipgloss and nail polish favors

Recently, the Girls got together and had a Spa Party. CC hosted, SB provided the food, CM brought the ingredients to make lotions and potions and I personalized the party favors. We each invited another friend and had a great time celebrating our friendship and making new friends. At the end of the day we all left with several containers of handmade beauty products and these fun little favors (pictured above).

Make your own personalized lip gloss and nail polish favors:

  1. Buy products in packaging that is nearly devoid of design and type. Often, products like these can be found at Target or other box stores.
  2. Buy rolls of vinyl made for the Cricut Expression cutting machine. If you do not have the Cricut Expression, you may hand cut the vinyl with sharp scissors.
  3. For these designs, use the Cindy Loo cartridge and Give a Hoot cartridge. Hand cut the cloud for behind the flying bird.
  4. Position the vinyl pieces over existing logos and type on the bottles.
  5. Place each pair in a pretty bag for giving, or put at each place-setting at the table.

Until Tomorrow~Sarah

Classes: Sew Something Fabulous! (A carry-anything pouch)

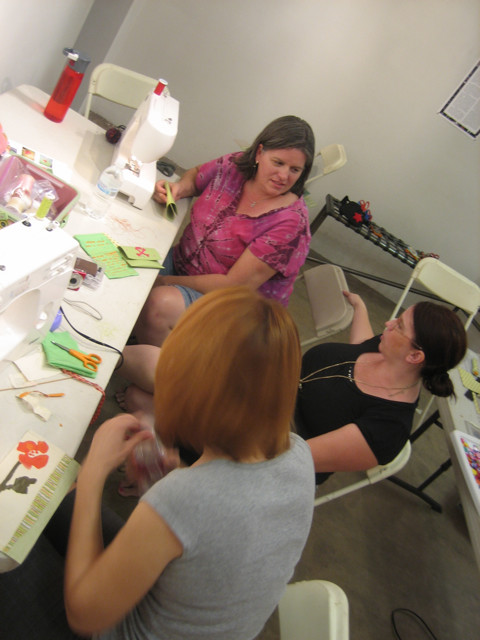
We had a great time Tuesday bringing out the sewing machines and playing with stitches and appliqué. The Eye Lounge on Roosevelt hosted the party and we made simple pouches and got creative.

Participants were shown the joy of setting aside perfectionism for the delight of discovery. We used squares of vinyl as a base for our great ideas. See the results below~

Go HERE to find out about upcoming classes >>

Wool sweater sleeve covers a flower pot

September is a busy month for birthdays. That means I am extra crafty this time of year. My awesome mother-in-law’s birthday is today and I whipped out this cute little thing in under an hour. She loves to have herbs on her sill for easy picking, so I think she’ll be thrilled.

I used a wool sweater that didn’t end up felting in the wash. What you see here is the end of the sleeve (the cuff is at the bottom of the pot.) It’s easy to do. Find a pot that fits into the arm hole of the sweater. It could be any sweater, actually, not just wool. Slip the pot in, and cut the arm high enough so it tucks in but doesn’t hit the bottom. Then, drop in a small potted plant. This Sage plant was purchased at a local nursery.

I had to add a little something special, of course, so I needle felted two mushrooms in her favorite colors.

Handmade African Teak tray for a birthday gift

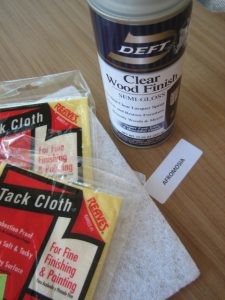
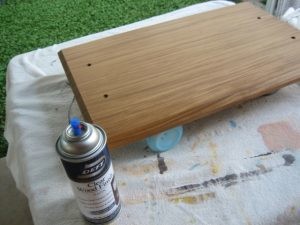
Recently, I needed an extra special gift, so I enlisted the woodworking skills of my most excellent husband to help me make this serving tray. I bought the wood at Woodworkers Source, and my friends at Modern Manor (a mid-century modern furniture store on the Melrose Curve in Phoenix) gifted me the handles. The pictures below illustrate the process…hover your mouse over the images for descriptions.

Now I want to make one for myself!

Until tomorrow~Sarah

DIY 351: Organize Hair Clips Into a Pretty Bouquet

The one accessory I am rarely without is a flower for my hair~especially these hot summer days when I have to wear my hair up to stay cool. The twenty-some flower clips I own were a little hard to sift through quickly until I attached them all to bamboo skewers and put them in a vase. Not only is it the prettiest thing in my bathroom, I can pick a flower and run~I love efficiency!

DYI 352: Sew Easy Coin Purses

I discovered the joy of sewing vinyl when I whipped out a few little bags to organize things in my purse. I have one for everything: receipts, gift cards, business cards, lip glosses. I even made one to hold little things I find while out and about.

How to make your own organizational pouch (“King Regent” pattern, shown above in upper right corner of pic):

  1. Cut a rectangle of vinyl (5″x6″)
  2. Choose  various colors of thread to embelish the outside, and sew lines or little pieces on
  3. Fold three ways (along the 6 inch side) and pin down one of the folds (when you sew this will be the pouch part, the other part is the flap)
  4. Sew up the sides to close in the pounch
  5. For the flap edge, trim a curve and sew a decorative rim~or simply cut with pinking sheers
  6. Sew a button on the pouch side, then dtermine where the hole should be on the flap
  7. Cut a button hole with scissors or a blade
  8. Repeat with all colors of vinyl and your purse will be cool and organized!

Until Tomorrow~Sarah

Button bracelet made from screen printed scraps

Every time I screen print I use up the last little bits of ink on scraps of paper and fabric. These bits and pieces are super handy when I am looking to put my signature on some project. One day last week I was covering buttons with fabric and turned to my box of scraps to see what was there. I was so delighted with the buttons I wanted to put them all together! Follow this link to a tutorial on how to make fabric covered buttons.

I just love the YUDU. The ink colors are beautiful and non-toxic. The set up is so easy I can break it out and have it all cleaned up in under 3 hours. (That includes designing, burning screens, and going to town on anything within arm’s reach.)