Category: blog

DIY 346: Spa Party~personalized lipgloss and nail polish favors

Recently, the Girls got together and had a Spa Party. CC hosted, SB provided the food, CM brought the ingredients to make lotions and potions and I personalized the party favors. We each invited another friend and had a great time celebrating our friendship and making new friends. At the end of the day we all left with several containers of handmade beauty products and these fun little favors (pictured above).

Make your own personalized lip gloss and nail polish favors:

  1. Buy products in packaging that is nearly devoid of design and type. Often, products like these can be found at Target or other box stores.
  2. Buy rolls of vinyl made for the Cricut Expression cutting machine. If you do not have the Cricut Expression, you may hand cut the vinyl with sharp scissors.
  3. For these designs, use the Cindy Loo cartridge and Give a Hoot cartridge. Hand cut the cloud for behind the flying bird.
  4. Position the vinyl pieces over existing logos and type on the bottles.
  5. Place each pair in a pretty bag for giving, or put at each place-setting at the table.

Until Tomorrow~Sarah

Classes: Sew Something Fabulous! (A carry-anything pouch)

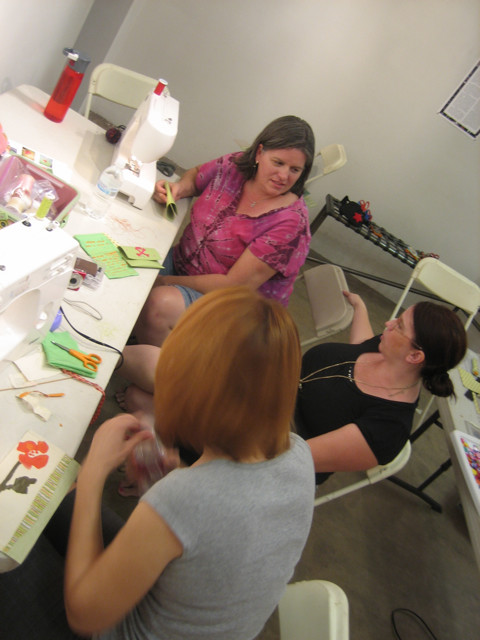
We had a great time Tuesday bringing out the sewing machines and playing with stitches and appliqué. The Eye Lounge on Roosevelt hosted the party and we made simple pouches and got creative.

Participants were shown the joy of setting aside perfectionism for the delight of discovery. We used squares of vinyl as a base for our great ideas. See the results below~

Go HERE to find out about upcoming classes >>

Wool sweater sleeve covers a flower pot

September is a busy month for birthdays. That means I am extra crafty this time of year. My awesome mother-in-law’s birthday is today and I whipped out this cute little thing in under an hour. She loves to have herbs on her sill for easy picking, so I think she’ll be thrilled.

I used a wool sweater that didn’t end up felting in the wash. What you see here is the end of the sleeve (the cuff is at the bottom of the pot.) It’s easy to do. Find a pot that fits into the arm hole of the sweater. It could be any sweater, actually, not just wool. Slip the pot in, and cut the arm high enough so it tucks in but doesn’t hit the bottom. Then, drop in a small potted plant. This Sage plant was purchased at a local nursery.

I had to add a little something special, of course, so I needle felted two mushrooms in her favorite colors.

Handmade African Teak tray for a birthday gift

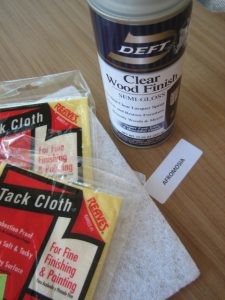
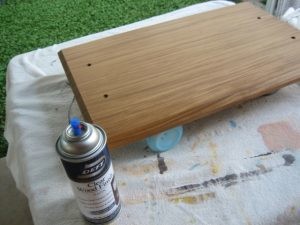
Recently, I needed an extra special gift, so I enlisted the woodworking skills of my most excellent husband to help me make this serving tray. I bought the wood at Woodworkers Source, and my friends at Modern Manor (a mid-century modern furniture store on the Melrose Curve in Phoenix) gifted me the handles. The pictures below illustrate the process…hover your mouse over the images for descriptions.

Now I want to make one for myself!

Until tomorrow~Sarah

1 inch tall needle-felted mushroom

I can now die happy. I was able to figure out in one afternoon how best to make needle felted mushrooms without stabbing myself to death. No secret, really…just work slow and be happy.

All there is left to do is trim off the fuzzies, sew on a jump ring and attach to a necklace. Ahhh…bliss.

DIY 347: Make a stylish cupcake stand from thrift store finds

It was my husband’s birthday the other day and I wanted to make him cupcakes~they are so festive looking stacked up on a cupcake stand. My problem…I don’t have a cupcake stand. My other problem…I hate to look of store bought ones. So, of course, I set out to make one.

I went to the White Dove thrift store down the street and found a candle stick, a vase, and three plates~all ceramic. Then, at home I glued them up using e6000. Voilà~the chicest cupcake stand I’ve ever seen.

Make your own cupcake stand from thrift store ceramics:

  1. In a thrift store, look for three plates that (A) do not match, (B) are graduated sizes, and (C) all have smooth, flat centers on top and bottom.
  2. Next, look for tall, thin ceramic pieces like vases and candle sticks. Let your good taste and personal style lead the way, and remember there needs to be enough room around the base for (standard) three-inch cupcakes.
  3. While still in the store, carefully assemble your pieces to check for stability. All stacked up, the plates and so-called pillars should be able to stand on their own. This ensures the glue will hold securely. If there is rocking or the pieces don’t fit together, keep looking.
  4. Bring it all home and wash and dry. Be sure all pieces are completely dry inside and out before gluing.
  5. e6000 is a stinky glue. Read directions and get plenty of ventilation.
  6. Start by gluing the upper pillar to the underside of the top plate (Section #1).
  7. Separately, glue the bottom pillar to the underside of the middle plate(Section #2).
  8. Let these two parts (Section #1 and Section #2) dry overnight outside or in a well ventilated area.
  9. The next day, glue Section #1 to Section #2. Let this dry for another day.
  10. Finally, when all the joints are dry, glue the tower to the bottom plate and let that dry for a day.

A note on the decorations:
I used Imaginesce paper (from the Birthday Bash collection) in the Cricut with the Cindy Loo cartridge to make the cupcake wrappers. The Cricut was set to 2-1/4″ and I got five up on a 12×12 sheet by cutting four (with paper saver on) then turning the mat around and feeding it back into the Cricut to cut one more with the “portrait” setting on.

The cupcakes are chocolate with cream cheese frosting decorated with coconut or sprinkles.

Until Tomorrow~Sarah

Needle felting is a kick a** process!

Alright~you got me…I should be nose-to-the-grindstone in my novel rewrite, but I discovered how to needle felt. Holy Crow! (As Aunt Midge always says). I’m in love!

Check out these little pouches I just made while taking a break from the book. They are so small, in fact, that I am hanging them on beaded chains and calling them modern craft lockets. When I get home I’m putting pics of my favorite peeps in there.

Now back to work!

Misadventures of MolliAnn Moos, a novel, in last stages of rewrite

I was heartbroken to have to choose between CHA and an opportunity to hunker down and finish my novel. While I will miss my dear crafty friends (especially the Mixology Girls) I was offered a beautiful getaway in Boulder for the next several weeks where I will have the peace, quiet and inspirational surroundings to complete the final revisions of the book before it is released to the wolves of the editing world.

I brought my sewing machine and a pile of fabric as my only respite from the rewrite. That’s not to say I don’t love the process of writing (most the time)~I just know there will be times my brain will need a break and my crafty hands will be hankering to make something. My plan is to create bags from canvases I painted several years ago. I’ll be reporting on both things as they progress